Migrate HCM Integrations
Migrate integrations between tenants; manage integration property values for Dimensions HCM.
Manage integration properties
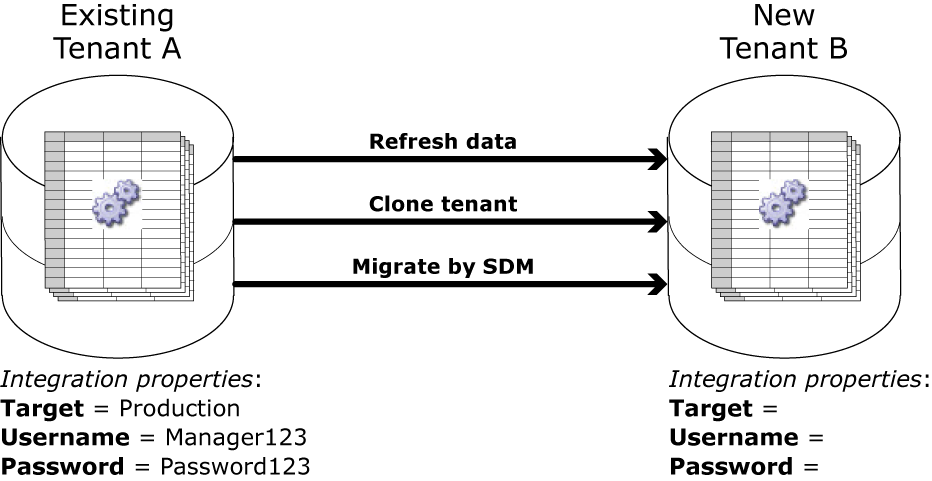
When you refresh, clone, or use Setup Data Manager (SDM) to migrate tenants — such as from non-production to production — the following integrations properties are deleted:
- Connection Settings: These properties define connections to the authentication server, API gateway, SFTP server, and application environment.
- : These properties define username, password, and related credentials.
Only properties that are identified with "
_External_" in the property name —<ProcessName>_External_<PropertyName>— are deleted.Example:
PeopleImport-v1_External_AuthenticationProperties
Use manage integration properties to preserve and download all of the original connection details and credentials — excluding passwords — in authentication properties that include "_External_" in the name. Once the tenant is refreshed, cloned, or migrated, you can upload these property values.
Why delete this data?
The connection and authentication properties are deleted (scrubbed) for the following reasons:
- Prevent the cloned or refreshed tenant from pointing to the same places as the source tenant. Example: Prevent a non-production tenant from linking to a production financial system.
- Reduce the chance of introducing non-production data into production systems, or production data into non-production systems.
Example scrubbed data
How to preserve this data?
However, you may need to refresh, clone, or migrate tenants frequently. For the new tenant to point to the same places as the source tenant, you can preserve rather than overwrite the connection and authentication properties. Example: Both tenants are test or development tenants and need to link to the same test HR system.
Manage integration properties allows you to do the following:
- Download and upload property values for multiple integrations.
- Preserve values before you refresh a tenant.
- Replace values after you clone or use SDM to migrate a tenant.
Manage integration property values
- Make sure that the Manage Integration Properties FAP is set to Allowed; see Configure Access to Integrations.
-
Download integration property values — On the tenant that you will refresh, clone, or migrate, do the following:
-
Click Tap
Main Menu
> Administration > Application Setup . - Select All Integrations.
-
Click Tap
Download
. The following file is downloaded:
IntegrationProperties_TenantName_AllIntegrations_DateAndTimeStamp.txtCaution: The file is encrypted, so do not open or edit it.
-
Click Tap
Main Menu
- Refresh, clone, or use SDM to migrate the tenant
-
Upload integration property values — When the refresh, clone, or migration finishes, upload the previously downloaded properties file. From the refreshed, cloned, or migrated tenant, do the following:
-
Click Tap
Main Menu
. -
Click Tap
Upload
. - In Filename, click tap Choose File.
- Navigate to and select the properties text (
.txt) file.The filename format is:
IntegrationProperties_TenantName_AllIntegrations_DateAndTimeStamp.txtCaution: The file is encrypted, so do not open or edit it. - Click Tap Upload to preview the properties and values.
- To include a property in the file to upload, select the property.
Click Tap
Include
. Repeat for other properties. Included properties show a check mark
. - (Optional) To edit the value of a property, select an included property from the list.
Click Tap
Edit
. Edit the value. Click Tap Save . - (Optional) To exclude a property from the file, select an included property.
Click Tap
Exclude
. - (Optional) To remove the selected file, click tap Reset.
- Click Tap Save.
-
Click Tap
Main Menu
- Reset the passwords in each integration on the tenants that you refreshed, cloned, or migrated.
Migrate integrations with SDM
Refer to the About Setup Data Manager topic for detailed instructions.
- Navigate to .
- Select a Source.
- Select Integrations and Integration Sets or Integrations.
- Select a Target.
-
Click Tap
Review and Publish
. - Click Tap Publish.
- To see the detailed results, click tap Go to Publish History.