Hours Allocation
Managers can allocate the time an employee works to different projects, such as labor categories, without the employee having to punch in and out for each different project they work on during the day. The allocation of hours does not impact totals, allocations are only used for billing purposes.
Typically, hours allocation occurs at the end of the current pay period, but it can be done weekly or daily. It is important to note that allocation should be applied consistently. For example, if you allocate daily then you should always allocate daily.
Hours Allocation configuration information
Before using hours allocation, the following configuration is required:
- Managers who are allocating hours need permission set in their Function Access Profile. This is controlled by the Allocate Hours access control point (Manager – Department Manager > Dataviews – Group Edits > Allocate Hours). See Function Access Profiles for more information.
- The combined paycode Worked Hours needs to be defined with the paycodes that constitute hours worked. The Worked Hours are the hours that appear in the Worked column on the Hours Allocation landing page. See Combined Paycodes for more information.
Allocate hours
- Select Main Menu
. - Select the time frame you need for allocation. The default time frame is Current Pay Period.
To change the time frame, select a symbolic time frame from the drop-down list or select a date or range of dates from the calendar
. For example, if you are allocating hours daily, you can select Today if you are allocating at the end of the day, or Yesterday if you are allocating at the beginning of the day for the previous day. Note: Allocation should be applied consistently. For example, if you allocate daily then you should always allocate daily. - Review the Hyperfind selection. The default Hyperfind is All Home. If needed, select Hyperfind
to change the Hyperfind. For more information about Hyperfinds, see Hyperfind selector.
- Review the employees who need hours allocated. By default, employees are sorted by Unallocated Hours (high to low).
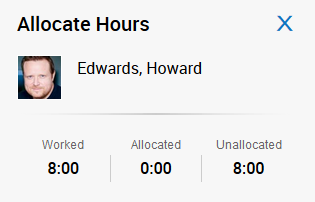
- Select one or more employees and then select Allocate Hours
. The Allocate Hours panel opens and provides the employee name, their worked hours, allocated hours, and unallocated hours. The unallocated hours are the available hours that can be allocated. The allocated and unallocated values update automatically as you allocate hours in the panel.
- For Transfer, either select a transfer from the list (this is a list of your most recently used transfers) or select More to select a new transfer. The Transfer is the location, job, cost center, labor category, or combinations you are allocating hours to.
If you select More, enter the following information:
Business Structure
The business structure defines where employees can work. To change the business structure:
- Click Tap Add Business Structure.
- In the Business Structure area, depending on your configuration, do one of the following:
- Select from the default list of locations and jobs (this list is based on the current job) or search by Location, Job, or both. You can also select Browse Entire List to view the various levels of the business structure.
- Use the arrows
to select the various levels of the business structure. To move back, use the left arrow You can also enter all or part of the desired business structure name or description in the Search box, then click tap Search . - Select locations and jobs from the drop-down lists.
- When finished, click tap OK.
To remove the business structure, click tapClear Business Structure.
Cost Center
To change the cost center:
- Click Tap Add Cost Center.
- Click Tap the down arrow
and select from the list of available cost centers. You can also enter part or all of a cost center in the Search box. - Click Tap OK.
Labor Categories
The labor category defines the work that employees can do within an organization. To change the labor category:
- Click Tap Add Labor Category.
- In the Labor Category area, select a labor category from the drop-down list. You can also enter part or all of a labor category in the Search box.
- When finished, click tap OK.
- For Amount, enter the number of hours to be allocated to that project (transfer). As you enter hours, the Allocated and Unallocated values automatically update to reflect your changes.
- Select Add Transfer to allocate hours to more projects (transfers).
- Optionally, select Add Comment to add comments and notes.
- When you are finished allocating hours, select Save.
- Optionally, if you have selected more than one employee, use the arrows at the top of the Allocate Hours panel to navigate to the next employee and allocate hours as necessary, saving after each employee.
- Select the X or Cancel to exit the Allocate Hours panel.
- Select Refresh
to view your changes in the Hours Allocation grid. When totalization is complete and the timecard totals have been updated, the Totals Up To Date Indicator column will have a check mark in it. The paycodes used for hours allocation are configured to display in the Totals add-on and not in the timecard grid.
Edit allocated hours
You can edit allocated hours as needed. On the Hours Allocation page, the Last Allocated Date Time column provides the date and time of the last saved allocations.
- Select
Main Menu
. - Select the employee you need to edit allocations for, and click
Allocate Hours
. - In the
Allocate Hours panel you can:
- Modify existing allocation amounts.
- Select the
to delete an allocation. - Select Add Transfer to add allocations.
- Optionally, add Comments and Notes.
- Click Save.
- Select
Refresh
to view your changes in the Hours Allocation grid.